Upgrading to Netscaler Release 10.5
Website Visitors:You can use the configuration utility to upgrade most older releases to 10.5. For others, you must use the command line interface. You follow the same basic procedure to upgrade either a standalone appliance or each appliance in a high availability pair, although additional considerations apply to upgrading a high availability pair.
This document includes the following information:
Upgrading a Standalone NetScaler
Before upgrading the system software, make sure that you have the required licenses. For more information, see “NetScaler Licensing Overview.” You do not need a new license for the following upgrades:
- 8.x to 9.x
- 8.x or 9.x to 10.x
- 8.x, 9.x, or 10.x to 10.y
Note: When upgrading from release 8.0, 8.1, 9.0, 9.1, 9.2, 9.3, 10, or 10.1, you have the option to use the configuration utility or the command line interface. Citrix recommends to perform the upgrade by using the command line interface. When using the upgrade wizard in the configuration utility to upgrade from release 8.0, do not use the Device option to upload your software.
In the following procedure,
| Release Version | ||
|---|---|---|
| 10.5 | 10.5 | 10.5 |
| 10.1 | 10.1 | 10.1 |
| 10 | 10 | 10 |
| 9.3 | 9.3 | 9.3 |
| 9.2 | 9.2 | 9.2 |
| 9.1 | 9.1 | 9.1 |
| 9.0 | 9.0 | 9.0 |
| 8.1 | rhodes | 8.1 |
| 8.0 | andes | 8.0 |
To upgrade a standalone NetScaler appliance running release 8.0, 8.1, 9.0, 9.1, 9.2, 9.3, 10, or 10.1 by using the command line interface
-
Use an SSH client, such as PuTTy, to open an SSH connection to the appliance.
-
Log on to the appliance by using the administrator credentials. Save the running configuration. At the prompt, type:save config
-
Create a copy of the ns.conf file. At the shell prompt, type:
- cd /nsconfig
- cp ns.conf ns.conf.NS
You should backup the configuration file to another computer.
-
(Optional) If you have modified some of the following files in the /etc directory, and copied them to /nsconfig to maintain persistency, any updates that are pushed to the /etc directory during the upgrade might be lost:
- ttys
- resolv.conf
- sshd_config
- host.conf
- newsyslog.conf
- host.conf
- httpd.conf
- rc.conf
- syslog.conf
- crontab
- monitrc
To avoid losing these updates, create a /var/nsconfig_backup directory, and move the customized files to this directory. That is, move any files that you modified in /etc directory and copied to /nsconfig by running the following command:
mv /nsconfig/
/var/nsconfig_backup Example:
mv /nsconfig/syslog.conf /var/nsconfig_backup
-
Create a location for the installation package. At the shell prompt type
- cd/var/nsinstall
- mkdir
nsinstall - cd
nsinstall - mkdir build_
- cd build_
-
Download or copy the installation package (build-
- _nc.tgz) to the directory that you created for it. To download the installation package from the Citrix Web site, do the following: - Go to MyCitrix.com, log on with your credentials, and click Downloads.
- In Select a Product, select NetScaler ADC.
- Under Firmware, click the release and build number to download.
- Click Get Firmware.
Note: Documentation is not available as part of the build in NetScaler release 10.1, build 118.7 or later. See Citrix NetScaler for the documentation.
-
Extract the contents of the installation package. Example:
tar –xvzf build_10.1-49.3_nc.tgz
-
Run the installns script to install the new version of the system software. The script updates the /etc directory. Example:
./installns
Note:
To install a FIPS appliance, run the installns script with the -F option. To automatically clean up the flash, run the installns script with the -c option.
Warning: When upgrading to the NetScaler nCore build, the installation script prompts you to delete the /var directory if the swap partition is smaller than 32 gigabytes (GB). If this prompt appears, type N, save any important files located in /var to a backup location, and then re-run the installation script.
If the free space available on the flash drive is insufficient to install the new build, the appliance prompts you to initiate a cleanup of the flash drive. For more information, see “Auto Cleanup“.
-
When prompted, restart the NetScaler.
-
(Optional) If you performed step 4, do the following:
- Manually compare the files in /var/nsconfig_backup and /etc and make appropriate changes in /etc.
- To maintain persistency, move the updated files in /etc to /nsconfig.
- Restart the appliance to put the changes into effect.
Example
|
|
To upgrade a standalone NetScaler running release 8.0, 8.1, 9.0, 9.1, 9.2, 9.3, 10, or 10.1 by using the configuration utility
-
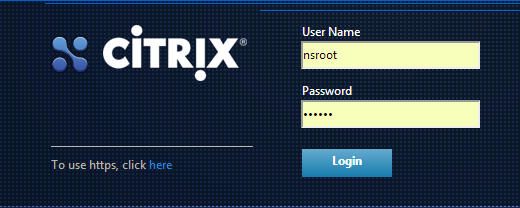
In a Web browser, type the IP address of the NetScaler, such as http://10.102.29.50.
-
In User Name and Password, type the administrator credentials and then click Login, as shown in the following figure.

NS_Login -
In the configuration utility, in the navigation pane, click System.
-
In the System Overview page, click System Upgrade.
-
Follow the instructions to upgrade the software.
-
When prompted, select Reboot.
Note: After the upgrade, close all browser instances and clear your computer’s cache before accessing the appliance.
Upgrading a High Availability Pair
To upgrade the system software on NetScaler units in a high availability (HA) pair, first upgrade the secondary node, and then the primary node.
Note: If the two nodes in an HA configuration are running different NetScaler software releases, the following information does not get synchronized on the primary and secondary nodes:
- States of the services
- Connection failover sessions
- Persistence sessions
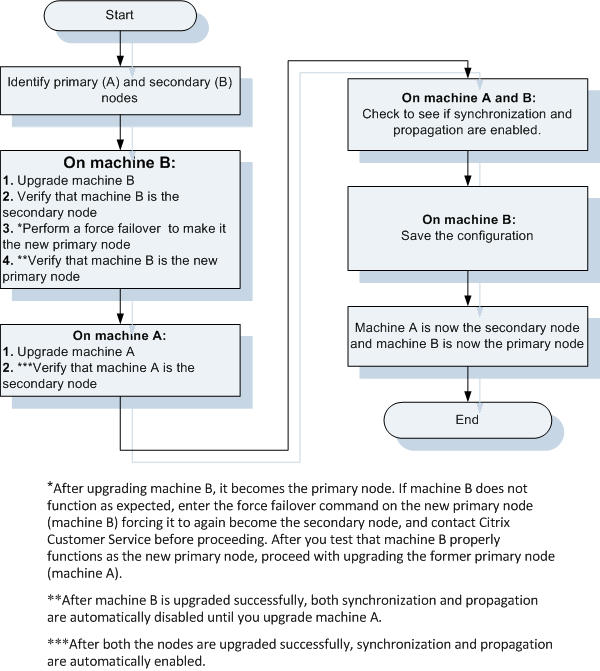
In the following procedure, machine A is the primary node and machine B is the secondary node before the upgrade.
To upgrade NetScaler units in a high availability pair running release 8.0, 8.1, 9.0, 9.1, 9.2, 9.3,10, or 10.1 by using the command line interface
On machine B (original secondary node)
-
Follow the procedure for upgrading a standalone node as described in “Upgrading a Standalone NetScaler Appliance“. The procedure includes optional steps to avoid losing any updates that are pushed to the /etc directory during the upgrade.
-
After the appliance restarts, log on with the administrator credentials and enter the show ha node command to verify that the appliance is a secondary node.
-
Test the new build by entering the force failover command on the secondary node (machine B). At the command prompt type force failover.
When you do so, machine B becomes the primary node. If machine B does not function as expected, enter the force failover command on the new primary node (machine B) forcing it to again become the secondary node, and contact Citrix Customer Service before proceeding.
-
Enter the show ha node command to verify that machine B is the new primary node.
Example
 1
 2
 3
 4
 5
 6
 7
 8
 9
10
11
12
13
14
15
login: nsroot Password: nsroot Last login: Mon Mar 26 08:37:26 2008 from 10.102.29.9 Done show ha node 2 nodes: 1) Node ID: 0 IP: 10.0.4.2 Node State: UP Master State: Primary ... Sync State: AUTO DISABLED Propagation: AUTO DISABLED ... DoneNote: After machine B is upgraded successfully, both synchronization and propagation are automatically disabled until you upgrade machine A.
On machine A (original primary node)
-
Follow the procedure for upgrading a standalone node as described in “Upgrading a Standalone NetScaler Appliance.” The procedure includes optional steps to avoid losing any updates that are pushed to the /etc directory during the upgrade.
-
After the appliance restarts, log on by using the administrator credentials, and enter the show ha node command to verify that the appliance is a secondary node and that synchronization is disabled.
Note: After both nodes are upgraded successfully, synchronization and propagation are automatically enabled.
On machine A and machine B
-
After successfully upgrading both the nodes, run the show ha node command to verify that synchronization and propagation are enabled on the primary node and synchronization is successful and propagation is enabled on the secondary node.
Example
On Primary node (Machine B)
show ha node
    Node ID:      0
    IP:   10.0.4.2
    Node State: UP
    Master State: Primary
    INC State: DISABLED
    Sync State: ENABLED
    Propagation: ENABLED
    Enabled Interfaces : 1/1
    Disabled Interfaces : None
    HA MON ON Interfaces : 1/1
    Local node information
    Critical Interfaces: 1/1
On Secondary node (Machine A)
Show ha node
    Node ID:      0
    IP:   10.0.4.11
    Node State: UP
    Master State: Secondary
    INC State: DISABLED
    Sync State: SUCCESS
    Propagation: ENABLED
    Enabled Interfaces : 1/1
    Disabled Interfaces : None
    HA MON ON Interfaces : 1/1
    Local node information:
    Critical Interfaces: 1/1
On machine B (new primary node)
-
Enter the save ns config command to save the configuration.
Machine B (original secondary node) is now the primary node and machine A (original primary node) is now the secondary node.
Note: You can enter the force failover command again to make machine A (original primary node) as the primary node and machine B (original secondary node) as the secondary node.
To upgrade NetScaler units in a high availability pair running release 8.0, 8.1, 9.0, 9.1, 9.2, 9.3, or 10 by using the configuration utility
-
Log on to the secondary node and perform the upgrade as described in “To upgrade a standalone NetScaler running release 8.0, 8.1, 9.0, 9.1, 9.2, or 9.3 by using the configuration utility.
Note: Before upgrading the primary node (machine A), you have the option to test the new release by entering the force failover command at the command line interface on the secondary node (machine B). When you do so, machine B becomes the primary node. If machine B does not function as expected, enter the force failover command at the command line interface on the new primary node (machine B) forcing it to again become the secondary node, and contact Citrix Customer Service before proceeding. If machine B properly assumes the role of primary node, proceed with upgrading the former primary node (machine A).
-
Log on to the primary node and perform the upgrade as described in “To upgrade a standalone NetScaler running release 8.0, 8.1, 9.0, 9.1, 9.2, or 9.3 by using the configuration utility“.
Posted in Citrix Edocs
Want to learn more on Citrix Automations and solutions???
Subscribe to get our latest content by email.